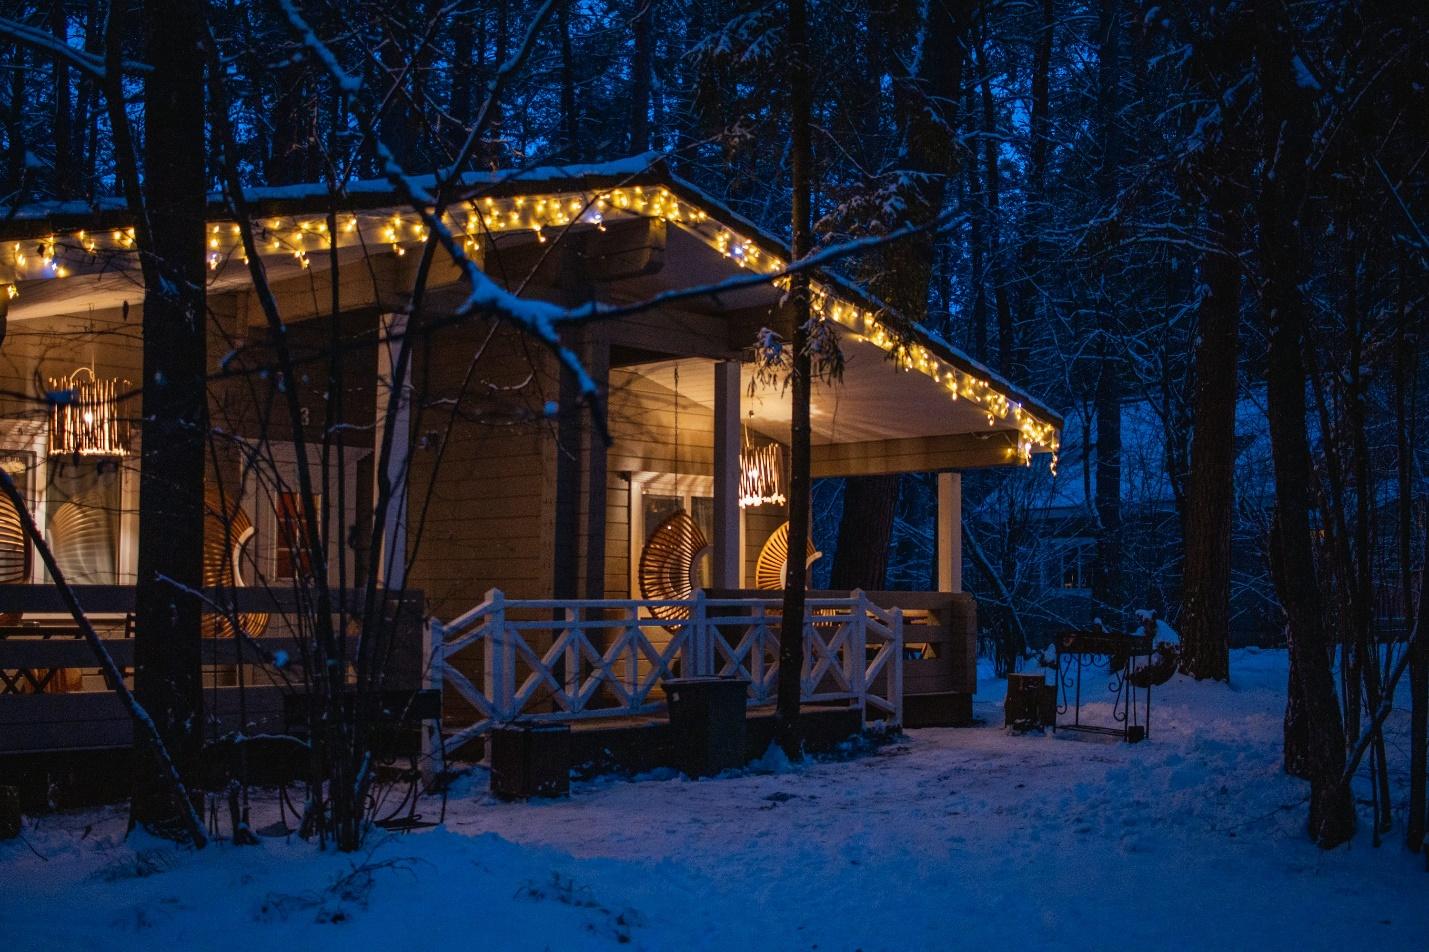
Adding outdoor lighting can make a big difference to your home’s curb appeal and functionality. Proper lighting allows you to safely navigate outdoor spaces at night, highlight architectural features, and create an inviting ambience. However, running wiring for permanent outdoor lights can be complicated and expensive. That’s where a portable power station comes in handy!
A solar power station is a versatile battery that can provide electricity on the go. With the right accessories, they allow you to set up temporary outdoor lighting solutions quickly and easily. With just a portable power station, lighting fixtures, and some mounting hardware, you can install beautiful and practical exterior lights without the complexity and commitment of wired installations. Read on, and let’s explore how a portable power station can help you build that perfect outdoor lighting system.
Different Types of Outdoor Lights Available
When planning an outdoor lighting project using a portable power station, the possibilities are endless. But with so many lighting options available, deciding what to use and where can get overwhelming. Keeping your needs, design goals, and logistics simple will help ensure success. Here are some of the most popular categories of outdoor lighting and tips for utilizing them effectively:
Spot Lights
These are very bright, directional lights designed to highlight architectural features, landscaping elements, or areas for safety. When selecting spotlights, consider the following:
- Lumens – Select higher lumens (1500+) for bright, focused beams over large areas. Lower lumens (450-800) are better for precision highlighting.
- Beam Angle – Narrow beams (25-45 degrees) cast focused light great for highlighting. Wider beams (45-90 degrees) are better for general wash lighting.
- Placement – Focus beams on design elements positioned higher on walls for the best facial lighting. Avoid aiming spotlights directly into eyes.
Backyard String Lights
Nothing sets the ambience quite like backyard string lighting. Key considerations when planning out string light configurations include:
- Bulb Type – Incandescent bulbs set a warm, inviting tone. LED bulbs are more efficient and last longer – important for hard-to-reach areas.
- Linkable Strands – Opt for linkable light strands to cover more surface area and create geometric patterns along fences, gazebos, etc.
- Mounting – Hang strings from screwing hooks into walls and structural surfaces. Use lighting tripods over seating areas. Weave through tree branches or overhead lattice.
Pathway & Deck Lights
Illuminating walking routes helps prevent trips and falls. For decks, washes of light enhance usability for entertaining. Things to factor in:
- Wired vs Solar – Wired lights provide consistent illumination. Solar lights absorb sunlight then turn on automatically at night – offering wireless convenience.
- Brightness – For pathways, 25-45 lumens spaced 5-8 feet apart work well. Decks may need 100+ lumens, with lights mounted to posts shining downward.
- Control – Use timers or light-sensitive switches on wired lights for automated control. Solar lights rely on environmental light.
Landscape lights
Landscape lights placed subtly within garden beds or flower pots to cast a dramatic glow onto surrounding walls and fence lines have become very trendy. Considerations when utilizing landscape lights include:
- Lumens – For subtle ambience, opt for lower output (300-500 lumens). For striking visual impact, use brighter lights (800-1500+ lumens).
- Positioning – Place landscape lights about 12 inches behind subjects to highlight vertically. Alternate light heights for dimension.
- Angle – Aim the beam upwards at a 45-degree angle, adjusting focus onto surfaces. Use locking fixtures to maintain position.
- Colour Temperature – Select warm (2700-3000K lights) to set a cosy vibe. Or go with bright, cool light (4000-6500K) for high contrast.
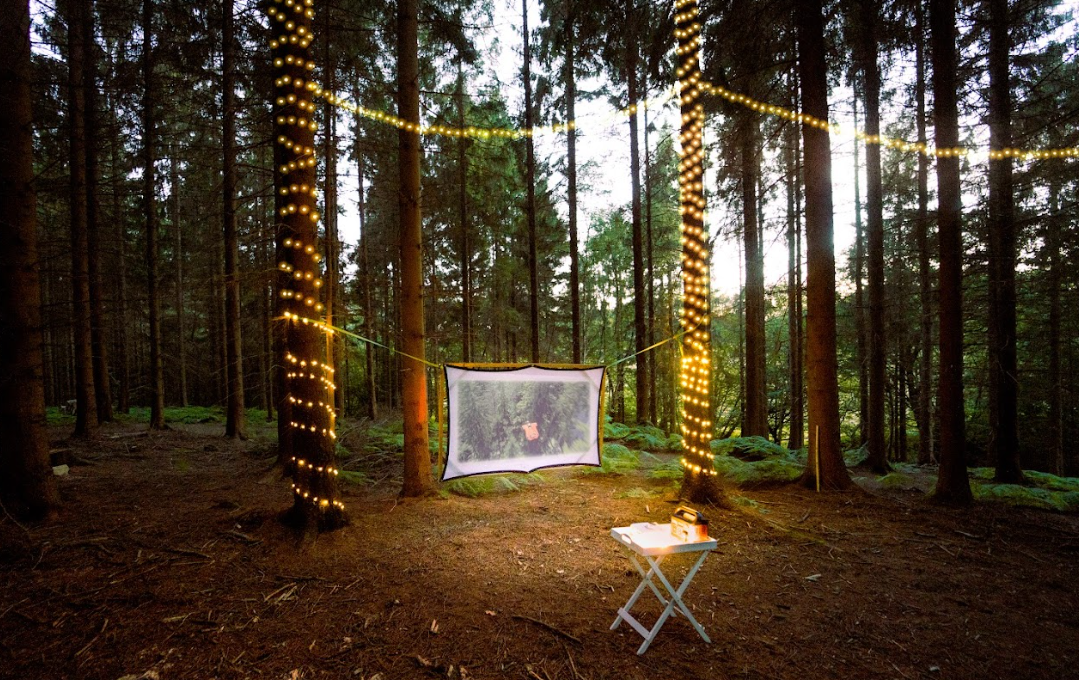
Rope & Festoon Lighting
Rope and festoon lights configured into patterns overhead provide a whimsical, playful glow. Planning considerations include:
- Bulb Spacing – Options typically range from 4 to 24 inches between bulbs along the strand. Dense spacing casts more ambient light.
- Shaping – Mold ropes into custom shapes and patterns along fences, gazebos, and trees using shaping wire or clips.
- Anchoring – Secure strings using insulated staples on wood surfaces. Anchor hooks work for overhead areas and vertical surfaces.
- Sheer Curtains – For diffused lighting, vertically hang inexpensive sheer curtains and weave rope lights horizontally behind them.
Properly laying out various lights comes down to thinking through sightlines within the space while keeping the practical limitations of the power source in mind. Don’t overload circuits or blocks of outlets. Use extension cords rated for outdoor use only. Position and angle adjustable fixtures to best showcase landscape features. Lastly, enjoy your newfound outdoor lighting ambience and the convenience of your portable power station that makes it all possible!

How to Set Up Different Types of Lights
When it comes to mounting your selected outdoor lighting fixtures, having the right tools and techniques for the installation surface is key. The good news is that with some basic DIY skills and a reliable portable power station for off-grid electricity, enhancing your space is straightforward. Here is a breakdown of how to appropriately set up and attach common lighting solutions to the four most typical outdoor surface types:
Brick & Stone
The masonry makeup of brick, concrete block, stucco and natural stone makes them ideal for securely anchoring lighting fixtures, though they require some specialized tools. Use these installation tips when gridding electrical into this rigid surface:
- Clean & Clear Debris – Use a wire brush attachment on your drill to remove dirt, efflorescence and loose particles from the area first.
- Hammer Drill Pilot Holes – Using a hammer drill function and masonry bit, drill evenly spaced pilot holes to insert anchors 4 inches deep or less.
- Install Insert Anchors – Place circular metal insert anchors into holes, then use a setting tool and mallet to securely wedge anchors into the holes.
- Attach Fixtures – Align the lighting fixture base plate over anchors and use screws to attach through provided holes. Don’t overtighten them, in case you would like to change them for other decorations!
Wood Surfaces
Softer wooden materials like siding, beams, fences and posts allow for easy screw-in placements without much pretreatment:
- Mark Holes – Map out desired light layout, then mark screw holes using a template or measurements. Ensure no vital infrastructure sits behind.
- Predrill Holes – Use a power drill with a slightly smaller diameter drill bit to create pilot holes at markings to the proper depth and prevent wood splitting.
- Anchor Fixtures – Align base plates and use outdoor-rated screws sized for material depth to securely anchor each light. Again, don’t overtighten!
Metal Surfaces
From wrought iron fencing to steel structural poles, metal offers both durability and great heat dissipation for lighting elements:
- Assess Location Strength – Ensure surface area can support the weight load of fixtures, relocating or reinforcing if needed.
- Use Machine Screws – Select corrosion-resistant machine screw sizes that won’t penetrate through the opposite side. It may need expandable anchors.
- Add Washers – Use plastic or rubber sealing washers behind light bases to protect the finish and provide a weatherproof, vibration-absorbent barrier.
Concrete Installation
Preparing concrete for lighting requires managing uneven textures and getting internal reinforcement right:
- Mark Holes & Channel – Map layout and use a concrete chisel tool to channel screw sites to proper depth. Clean away debris.
- Use Concrete Anchors – Hammer in integrated concrete screw anchors so that the fixtures can be supported flush to the surface.
- Seal Perimeter – After attaching lights to appropriate torque with outdoor-rated screws, seal any small gaps in the base perimeter with weatherproof caulking.
For power, simply link lighting elements to grounded extension cords connected to your portable power station. For permanent or more powerful setups, consult a licensed electrician about running dedicated outdoor lighting circuits equipped with GFI outlets through exterior-rated conduit piping. Always exercise caution and turn off all lights before handling fixtures for adjustments, bulb changes or removals!
Creative Mounting Solutions
If your desired mounting surface is unavailable or the lighting effect you want requires more innovative placement, get creative! Use these unconventional mounting tactics:
Tree Installation
- Use weatherproof tree straps or ask an arborist about tree-safe mounting solutions to attach lights.
- For pathway visibility, utilize adjustable floodlights angled from high, sturdy branches.
- To spotlight architectural elements, angle spotlights hidden within tree canopies focusing downward.
Temporary Structures
- Build inexpensive PVC or wood stands secured with stabilizer bars to mount floodlights in garden beds and along high fences, emulating professional tower lights.
- Fashion a wooden triangle attached to a sturdy vertical pole anchored in the ground to mount string lights high overhead for an ambient glow, similar to a small pergola.
Accessorizing Fixtures
- Use angled floodlight mounts, spotlight swivels and adjustable pole connections to refine beam angles and illuminate target areas better with precision.
- Attach plastic shade covers, lens filters and light baffles to spotlights and floodlights to diffuse glare, shape the beam, colourize the light or direct stray lighting.
- For fixtures lacking hanging hardware, use weatherproof industrial adhesive strips to supplement attachments to smooth surfaces.
The right accessories ensure you achieve the exact mood lighting look and functionality you desire, all powered conveniently through your outdoor portable power station!
As always, take proper safety precautions by turning off lights at the power source before handling. Seek expert guidance from electricians when attempting more complex, unconventional or risky installations. Your lighting creativity is only limited by your imagination when enabled by off-grid power solutions!
Get Jackery Explorer 1000 v2 Portable Power Station to Power Up
When selecting a portable power station to energize your outdoor lighting projects, having a reliable, high-capacity, and safe power source is key. That’s why Jackery Explorer 1000 v2 Portable Power Station stands out as an exceptional choice. It is the best portable power station available for your needs.

With a sizeable 1070Wh lithium iron phosphate (LiFePO4) battery, it can meet even robust power needs for hours of illumination time across multiple light sources. The 1500W pure sine inverter delivers enough output capacity to simultaneously run several lighting fixtures without overload or disruption, thanks to advanced safety protection technology.
Four ultra-efficient charging methods, including wall, solar, car, and emergency charging, ensure your station stays conveniently juiced up and ready for action. The integrated ChargeShield system safeguards the battery using advanced BMS monitoring and multilayer physical protections for long 10+ year lifespans.
Despite its formidable strength, the Jackery Explorer 1000 v2 Portable Power Station retains a surprisingly compact and portable form factor. At just 23.8 pounds with a foldable carrying handle and a slim, organized layout, it proves perfect for stowing and transporting to your outdoor living space.
So, when considering powering an array of string lights, spotlights, pool lights and other exterior fixtures without complex electrical work, the Jackery Explorer 1000 v2 portable power station checks all the boxes. Its robust capacity, multi-charging flexibility, advanced safety, portable convenience, and years of reliable construction make off-grid outdoor illuminating projects easy and enjoyable. Let this capable Jackery power station energize your lighting creativity today!
Final Words
Enhancing your outdoor living space with beautiful, functional lighting is now easier than ever, thanks to portable power supply. These compact batteries equipped with AC outlets provide the flexible off-grid power source needed to electrify lighting setups of all sizes.
As we’ve explored, properly selecting and positioning light fixtures that meet your unique needs is the first step. Wall-mounted LED spotlights, ambient string lights, sleek pathway luminaries and more each serve a role depending on the mood and utility you want to achieve.
Installing these lights securely on brick, wood, metal and concrete surfaces comes down to having the right mounting hardware and drilling tools tailored to each. A bit of careful measuring and mechanical finesse combine to create dazzling results.
Hooking lighting elements up to a portable power station like the Jackery Explorer 1000 v2 rather than wiring into permanent circuits simplifies installations exponentially. Their compact form with lengthy runtimes on a single charge grants flexibility in arranging an electrified, luminous backyard oasis.
So don’t let complicated electrical work deter you from enhancing your home’s atmosphere and functionality after dusk. The capabilities of modern portable power stations make Do-It-Yourself outdoor lighting projects approachable for novice DIYers. Let your illumination creativity shine brightly!