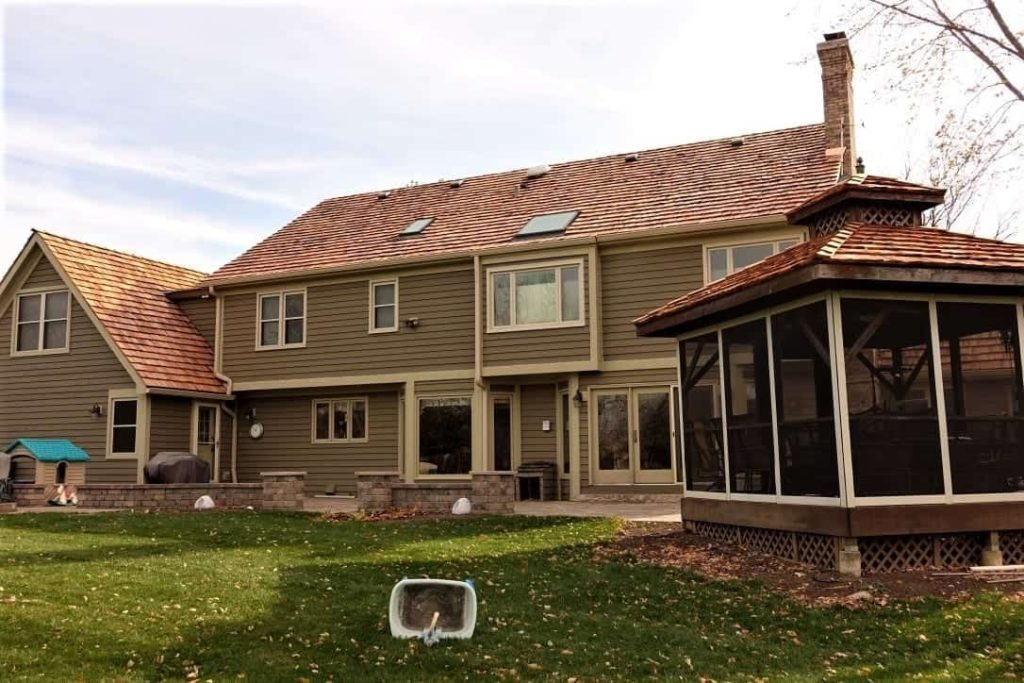
Your home’s roof is its first line of defense against the elements, and when it comes to traditional beauty and durability, few roofing materials can compare to cedar shake. Cedar shake roofs are not only aesthetically pleasing but also known for their resilience. However, even the most robust roofs require maintenance and occasional repairs. In this guide, we’ll walk you through the essential steps of cedar shake roof repair, making it simple and accessible for homeowners.
Understanding Cedar Shake Roof Damage
Before you start any repair work, it’s crucial to identify the signs of damage on your cedar shake roof. Common issues include:
- Split or Cracked Shakes: Inspect the surface for splits or cracks in the cedar shakes. These can occur due to weathering or age.
- Moss and Algae Growth: Cedar shakes are susceptible to moss and algae growth, especially in damp climates. This can lead to decay if not addressed promptly.
- Missing Shakes: High winds or severe weather can dislodge cedar shakes, leaving gaps that need immediate attention.
- Rot and Decay: Over time, cedar shakes can rot or decay, compromising their integrity and the roof’s overall strength.
Materials and Tools
To get started with your cedar shake roof repair, gather the following materials and tools:
- Replacement cedar shakes
- Roofing nails
- Hammer or nail gun
- Pry bar
- Caulk or roofing sealant
- Roofing felt
- Safety gear (gloves, goggles, and a safety harness)
Step-by-Step Repair Process
1. Safety First: Begin by ensuring your safety. Wear appropriate gear and use a stable ladder or scaffold to access the roof safely. Safety should always be the top priority when working on any roofing project.
2. Remove Damaged Shakes: Use the pry bar to carefully remove any damaged or rotted cedar shakes. Be gentle to avoid causing additional harm to neighboring shakes. Inspect the underlying wood for any signs of rot and replace any compromised boards as well.
3. Inspect the Underlayment: After removing the damaged shakes, inspect the underlying roofing felt or underlayment. Replace any damaged sections to maintain proper weatherproofing. Ensuring that the underlayment is in good condition is essential to prevent leaks and moisture damage.
4. Replace Shakes: Install the new cedar shakes in place of the old ones. Ensure the roof replacement are aligned correctly, and use roofing nails to secure them. Use roofing sealant or caulk to seal around the edges and prevent leaks. Take your time to make sure each shake is properly positioned and secured.
5. Moss and Algae Removal: If you have moss or algae growth, clean the affected areas using a mild solution of water and bleach. Be cautious not to damage the shakes during this process. Properly maintaining the surface of your cedar shakes will help prolong their lifespan.
6. Regular Maintenance: To extend the lifespan of your cedar shake roof, conduct regular inspections. Look for signs of damage, moss growth, or loose shakes. Promptly address any issues to prevent them from worsening. Regular maintenance can significantly reduce the frequency and complexity of repairs.
Conclusion
Cedar shake roof repair doesn’t have to be a daunting task. By understanding the signs of damage, having the right materials and tools on hand, and following these simple steps, you can ensure the longevity and beauty of your cedar shake roof. Regular maintenance and timely repairs will keep your home protected and looking its best for years to come. A well-maintained cedar shake roof not only enhances your home’s curb appeal but also provides reliable protection. Remember that safety is paramount during any repair work. If you’re ever unsure about tackling a cedar shake roof repair yourself, it’s wise to consult with a professional roofing contractor to ensure the job is done right. Taking care of your cedar shake roof will preserve its natural charm and keep your home safe and secure.